

The most common milk steaming mistakes come down to three things. They are where you hold the steam wand, how much air you let in, and how hot the milk gets. Fix those three, and your milk turns glossy and smooth instead of bubbly and thin.
Steaming milk looks easy when a barista does it, but your first try often comes out stiff, watery, or full of big bubbles. That’s normal, and almost every beginner runs into the same few problems.
This guide walks through the common mistakes beginners make with milk steaming, nine in total. For each one, you’ll see what it looks like, why it happens, and how to fix it. You’ll also find a cheap way to practice without pouring milk down the drain.
What Good Steamed Milk Looks Like
Good steamed milk is smooth, shiny, and somewhat thick, resembling wet paint, with bubbles that are so tiny that you won’t see them at all. This texture is known as microfoam, and any latte art pattern requires it.
Let’s quickly understand the difference between microfoam and froth. Steaming the milk will add a bit of fine air bubbles and the result will be microfoam. Frothing adds a lot more air, and is usually performed with a handheld frother, which makes the foam thick and stiff.
This is a guide to the steam wand of an espresso machine. If frothing milk with a frother is what you want to know, it is another tool that has its own set of idiosyncrasies. However, there are a few tips to keep in mind for both:
To check your milk, tap the pitcher and give it a swirl. A top that looks like glossy paint means you did well, while foam chunks or large bubbles point to one of the mistakes below. In fact, many latte art mistakes beginners make start with the milk rather than the pour.
9 Milk Steaming Mistakes Beginners Make
The table below sums up the common milk steaming mistakes, and the details for each one follow.
| Mistake | What you see | Quick fix |
| 1. Not purging the wand | Watery milk, blocked tip | Purge before and after |
| 2. Tip in the dead center | Milk does not spin | Set the tip off center |
| 3. Tip too high while aerating | Loud noise, big bubbles | Sink the tip slightly |
| 4. Tip too deep while aerating | Hot milk with no foam | Raise the tip until it hisses softly |
| 5. Too much air, or air too late | Stiff foam or large bubbles | Stop aerating once the pitcher feels lukewarm |
| 6. Overheating | Flat, thin, dull taste | Stop at 55 to 65°C |
| 7. Wrong amount of milk | Spills over, or heats too fast | Fill to just below the spout |
| 8. Skipping the tap and swirl | Foam sits on thin milk | Tap, swirl, and pour right away |
| 9. Warm milk or warm pitcher | Coarse foam | Start cold |
1. Not Purging the Steam Wand
Always purge the wand before and after you steam. Water from earlier use sits inside the wand, and if you skip the purge, that water ends up in your milk and thins it out. Dried milk in the tip can also block the steam holes over time.
Before you start, release a short burst of steam into the drip tray. When you finish, wipe the wand with a damp cloth, then purge once more to clear the inside.
2. Placing the Tip in the Dead Center
Is the milk sitting still instead of spinning? The tip is probably in the dead center of the pitcher. While air is going in, set the tip slightly off center and close to the surface of the milk. That position creates a spin, called a whirlpool, which folds the foam evenly through the milk and breaks big bubbles into tiny ones.
3. Holding the Tip Too High
Listen for a loud ripping noise? The tip is not in the milk, but just on the surface. In the air phase, only allow the tip to come in contact with the surface just below it, so it creates a soft, continuous hissing sound. If the sound becomes harsh and soapy bubbles start to form, lower the tip slightly further until the sound is soothed.
4. Burying the Tip Too Deep
Lots of heat and no foam whatsoever! The tip is placed too deep in the milk and only heats the milk with no body, so you are left with hot, flat milk. Raise the top until you hear that tiny “hiss” and slowly let in the air. After this, push it deeper for the spin phase, which is a normal move, but not ‘burying’ it from the beginning.
5. Adding Too Much Air or Adding It Too Late
Aerate only at the start, while the milk is still cold, and stop once the pitcher feels lukewarm in your hand. The exact number of seconds changes with your pitcher size and machine power. That’s why the warmth of the pitcher is a better guide than a clock. Too much air gives you stiff, dry foam, and air that goes in late leaves large bubbles that won’t blend in. This is one of the biggest reasons milk turns bubbly.
6. Overheating the Milk
Stop steaming at about 55 to 65°C, when the pitcher gets hot enough that you want to pull your hand back. The right milk steaming temperature keeps the milk sweet and smooth, but going past it makes the milk taste flat and turn thin.
A small clip-on thermometer helps while you’re learning. Also, switch off the steam before you take the wand out of the milk, or you’ll spray milk across the counter.
7. Using Too Little or Too Much Milk
Fill the pitcher to just below the point where the spout begins. Milk grows as air goes in, so it needs room to expand. Too much milk spills over the rim, while too little heats up so fast that you run out of time to aerate and spin it.
8. Skipping the Tap and Swirl
Ever noticed when pouring thin milk some of the foam is stiff? You have waited too long after steaming. Once you’re done, pat the pitcher on the counter to remove any bubbles on the surface, and then swirl to maintain the foam and milk mixture. Pour immediately, before it separates into two layers.
9. Starting with Warm Milk or a Warm Pitcher
Use milk as it comes from the fridge and a cold pitcher. If it cools down, you will get more time to stretch it out before it gets hot. The milk foam is coarse and the product is over-heated in the short time it takes to reach the set heat. If possible, a brief cold water shower under the tap will help the pitcher.
Why Is My Milk Bubbling Instead of Frothing?
Milk bubbles instead of turning silky when the wand tip sits too high or the air goes in too late. These are usually the first two milk steaming mistakes beginners notice. So if you keep asking why is my steamed milk bubbly, check those two first. Sink the tip slightly so the hiss stays soft, and only aerate at the start. Then spin the milk, tap the pitcher, and swirl to clear any bubbles that are left.
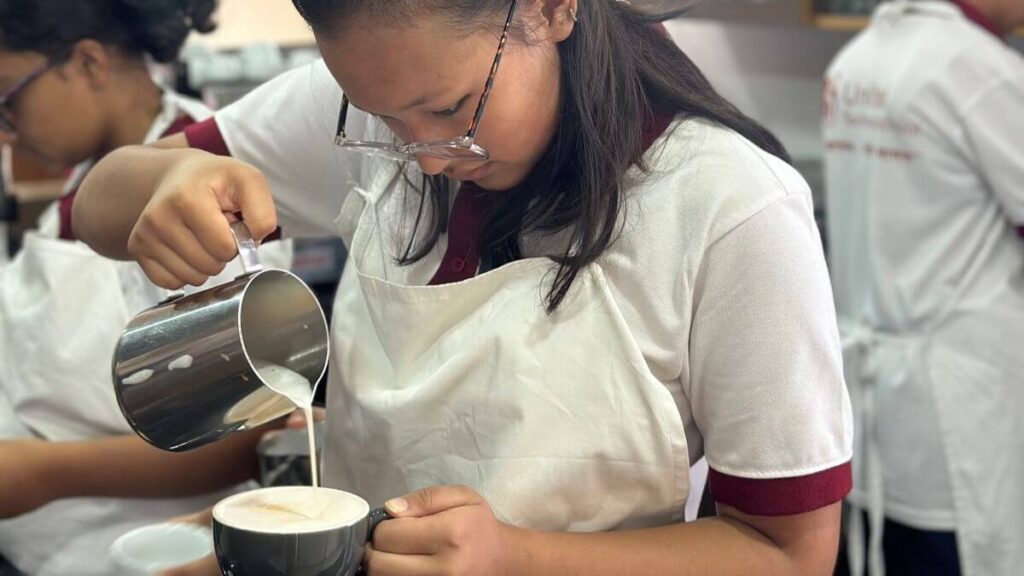
Still getting some bubbly milk? The problem can be identified by a trainer within a few pours. Join our one-day latte art session at United Technical School in Kumaripati and practice on cafe-style espresso machines
How to Steam Milk Correctly (Quick Steps)
To steam milk correctly, use cold milk in a cold pitcher and purge the milk wand. Allow air to flow in until the pitcher’s hand feels lukewarm, then spin the milk until it reaches between 55 and 65°C and then tap, swirl, and pour immediately.
If you’re still figuring out how to steam milk for latte art, these five steps are a solid place to begin. Think of them as a short how to steam milk for perfect latte art step by step guide that you can keep beside your machine.
- Pour cold milk into a cold pitcher, stopping just below the spout.
- Purge the wand into the drip tray.
- Set the tip near the surface and slightly off center. Turn on the steam and listen for a soft hiss as the air goes in.
- Once the pitcher feels lukewarm, sink the tip a little so the milk spins. Switch off the steam at 55 to 65°C, before you lift the wand out.
- Wipe and purge the wand, then tap the pitcher, swirl, and pour.
Want to go further? Our guide on how to make latte art at home explains the pouring part, step by step.
Prefer to learn these steps with a trainer beside you? Call +977 9801870715 to check the next available class date.
Best Milk for Beginners
When you’re just beginning, it’s best to choose whole milk. It’s fat and protein produce a steady, creamy foam that conceals small leaks while you’re still getting the hang of the technique.
Plant milk works, too, but in different ways. Most of the time, barista oat milk will give you the easiest milk to steam, while plant milks tend to give a lighter foam that may be unable to support a design for an extended period of time. Begin with dairy and progress when you feel that your steam wand technique is solid.
Wondering which drinks need the most steamed milk? Our list of the 15 most popular types of coffee explains how a latte, cappuccino, and flat white differ.
How to Practice Without Wasting Milk
Steaming takes many attempts, and milk costs money, so it pays to practice smart.
Fill water pitcher with water and add one small drop of dish soap; steam as you would steam milk. This soap can keep the water bubbling, so you’ll not waste milk while getting your tip position, sound and timing. Don’t drink it afterwards.
Change only one thing at a time. Work on the sound first, then the spin, and then the heat. Filming your hands on your phone also helps you catch errors that you can’t feel in the moment.

Learn Milk Steaming Hands-On in Kathmandu
Reading about milk steaming mistakes helps, but the sound of the wand and the feel of a warming pitcher are hard to learn from a page. A trainer can watch your hands and correct them on the spot.
If you want a latte art class in Kathmandu, the One Day Latte Art Master Class is built for beginners. It’s held at United Technical School in Kumaripati, Lalitpur, and runs for four hours. You get about one hour of theory and demo, followed by roughly three hours of hands-on practice. In the first hour, you’ll see how properly steamed milk differs from over-steamed and under-steamed milk. After that, you practice on espresso machines like the ones used in real cafes, supported by the school’s coffee and equipment partners.
Mr. Sujan Shrestha, our latte art instructor, and Mr. Lal Bahadur Budhathoki, our Head Barista Instructor, guide the training. Mr. Budhathoki has worked in the coffee industry since 2012.
Looking for a full career path instead? Our CTEVT-affiliated Barista Training Course covers espresso, coffee beans, and cafe work in much more depth. It’s the better fit if you want a barista course in Kathmandu that leads to a job. Not sure which one suits you? Read our guide on barista vs latte art class.
Ready to pour your first heart? Seats are limited, book your seat today at +977 9801870715 and reserve your seat for the next session
Final Thoughts
Milk steaming mistakes are normal, and every barista has made them. Fix them one at a time, starting with the wand position, then the air, and then the heat. With a little practice each day, your milk will turn glossy sooner than you’d expect.
If you’d like a trainer to guide you through it, book a latte art class at United Technical School.
Keep reading:
- From Bean to Cup: Master the Art of Coffee Making with UTS
- Exploring Home Brewing and Coffee Processing Methods
- Barista vs Bakery Course: Which One Should You Choose?
- Best Short-Term Courses After SEE in Nepal
FAQs
What are the most common milk steaming mistakes?
The most common milk steaming mistakes are a badly placed wand tip, too much air or air added late, and overheated milk. Forgetting to purge the wand and skipping the tap and swirl are common too.
What common mistake should be avoided when frothing milk?
A common mistake is adding too much air, or adding it too late. Let air in only at the start, stop once the pitcher feels lukewarm, and keep the tip close to the surface during that phase.
How to steam milk correctly?
Fill a cold pitcher with cold milk; rinse the wand first. Aerate until pitcher is luke warm then spin the milk to 55-65°C, tap, swirl, and pour immediately.
What factors must you control when steaming milk?
You control three main things: the wand tip position, the amount of air, and the temperature. The type of milk and how cold it is at the start also make a difference.
Why is my steamed milk not foamy?
Steamed milk will not be frothy if there is little to no air in it. Either the tip might be plunged deeper into the milk, or you aerated the milk too late. Bring up the tip just enough to hear a slight hiss and begin aerating. Overly hot milk does not retain foam well either.