
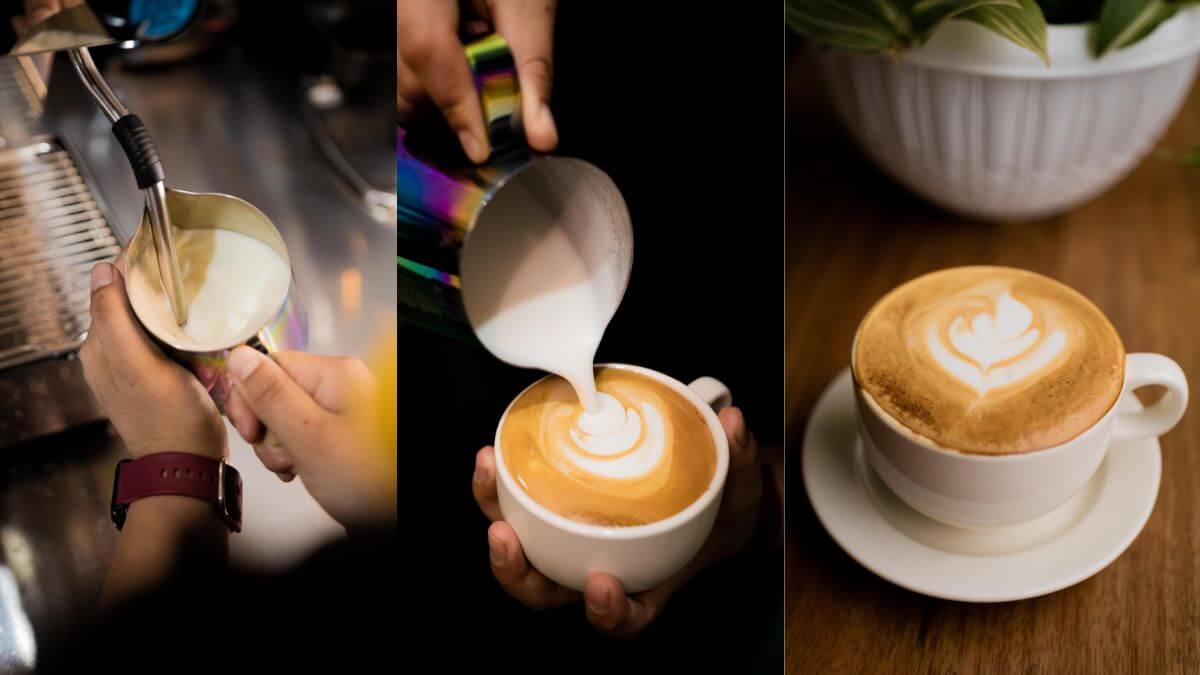
Everybody thinks that making latte art is something that happens only behind the coffee shop counter. That is not always the case. The basic technique of pouring steamed milk into coffee, which is done precisely and with control, can be applied in home conditions too. You do not have to invest in expensive equipment to start practicing latte art. All you need is to learn some basics and dedicate enough time to your skill development.
This blog will explain to you what latte art actually is, what you need to start doing it, and how you can steam the milk and pour patterns without wasting one cup of coffee after another.
What Is Latte Art
Latte art is the shape you can see on the surface of latte, created by pouring steamed milk into espresso in a controlled way.It requires proper milk steaming, microfoam texture, pouring speed, height, and control to create clean and attractive designs.
The right balance of fat and air in milk helps it float on the surface of the coffee rather than blending immediately, allowing baristas to create patterns such as hearts and rosettas. It looks like a magic trick, but it is all about two techniques performed correctly – milk and pouring.Latte art is the shape you can see on the surface of latte created by pouring steamed milk into espresso in controlled way. Fat and air contained in the right milk allow it to float above the coffee instead of mixing with it, thus making it possible to create heart and rosetta shapes. It looks like a magic trick, but it is all about two techniques performed correctly – milk and pouring.
What You Need Before You Start
Without Equipment and Ingredients
You do not need a full cafe setup to practice at home. Here is the basic list:
- A shot of espresso, or strong brewed coffee if you do not have an espresso machine
- Whole milk, since it steams and holds shape better than low-fat milk
- A steam wand on your home espresso machine, or a milk frother if you lack one
- A metal pitcher with a pointed spout that allows you to be more precise in the pour
Even if you are using a frother in place of the steam wand, you can still learn to pour, although the milk microfoam will not behave quite as well as steamed milk does with an espresso machine.
You can also use oat or soy milk for your latte art, although not all brands foam alike. The best option is the kind labeled “barista,” because that is designed to behave like dairy milk. Ordinary oat or soy milk tends to create a lighter, more fragile foam that won’t support a design.
With Equipment & Ingredients
For espresso-based coffee preparation, the required equipment includes an espresso machine, coffee grinder, tamper, portafilter, knock box, milk pitcher, digital weighing scale, thermometer, espresso cups, shot glass, cleaning brush, and cloth. The main ingredients include fresh coffee beans, fresh milk, drinking water, sugar, and chocolate or cocoa powder.
For a home setup without an espresso machine, coffee can be prepared using manual brewing methods such as French Press, V60, and AeroPress. The required equipment includes a coffee grinder, digital weighing scale, gooseneck kettle, timer, measuring spoon, coffee cups or server, and appropriate paper filters. The main ingredients include fresh coffee beans and drinking water, with milk and sugar as optional ingredients.
How to Steam Milk for Latte Art
This is the part most people skip but is actually the most important aspect of making latte art.
Add cold milk to a clean stainless-steel pitcher. Fill it only to around one-third of the pitcher to allow enough space for the milk to expand.
Position the steam wand just below the surface of the milk, slightly off-center. This helps create a smooth swirling motion, also known as a vortex.
Introduce air during the first few seconds by keeping the steam wand close to the milk surface. You should hear a gentle sound rather than a loud hissing noise.
Once enough air has been incorporated, submerge the steam wand slightly deeper while maintaining the swirling motion. This breaks down larger bubbles and creates smooth, fine microfoam.
Continue steaming until the milk reaches approximately 55–65°C. The pitcher should feel very warm but should still be comfortable to touch briefly.
Turn off the steam before removing the wand from the milk. Wipe and purge the steam wand immediately after use.
Tap the pitcher gently on the counter and swirl the milk to remove any remaining large bubbles and maintain a smooth texture.
What You Are Looking For: Microfoam
The ideal milk for latte art is called microfoam—milk with extremely fine bubbles that are almost invisible. It should look glossy and smooth, similar to wet paint, and should flow easily when poured.
- Too foamy or stiff: Too much air was introduced.
- Flat with no foam: Not enough air was incorporated.
- Smooth, glossy, and fluid: Perfect for latte art.
Basic Latte Art Patterns to Start With
Once your milk is steamed properly, you can start practicing pours. Learn these in order, since each one builds on the last.
The heart is the easiest pattern to start with. Pour the milk into the center of the cup from a height, then lower the pitcher closer to the surface as the cup fills, and finish with a straight pull through the middle to create the point of the heart.
The tulip builds on the heart. Instead of one steady pour, you pour in short stages, pausing to create layered shapes stacked on top of each other. A straight pull through the center at the end locks the layers into shape.
The rosetta is the pattern most people associate with professional latte art. It uses a gentle side to side wiggle while pouring, which creates the leaf like pattern. Pull straight through the middle at the end to give the leaves their point.
New Class Starting Soon at United Technical School, Kumaripati
Common Mistakes Beginners Make
Latte art requires control and practice. Focus on milk texture, pouring height, speed, and pitcher movement rather than trying to create complicated designs immediately.
Most beginner mistakes trace back to just a few habits.
- Milk that is too hot can lose its natural sweetness and produce poor-quality foam. Avoid overheating the milk.
- Pouring too fast from too high up usually causes the milk to sink instead of sitting on top.
- Milk that is over-steamed and stiff will not spread properly, no matter how good your pour is.
- Holding the pitcher too far from the cup makes it hard to control where the milk lands.
- If your pattern looks messy, it is worth checking your milk texture before blaming your pour.
- Large bubbles indicate poor steaming technique. Keep the steam wand positioned correctly and maintain a smooth vortex.
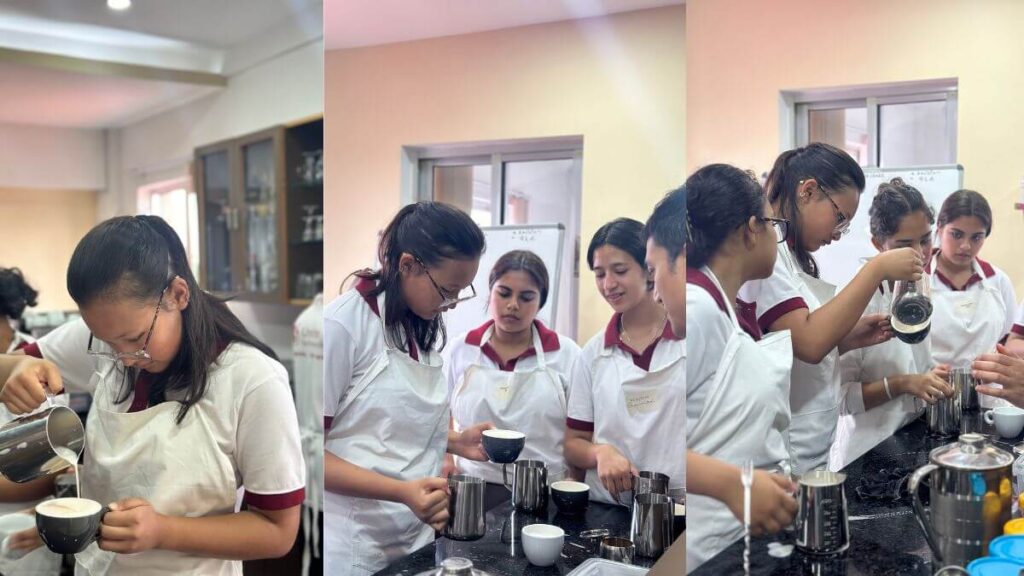
12 Latte Art Designs to Know
The heart, tulip, and rosetta designs are the ones that every beginner starts with; however, there are many other things you can learn to do once your pouring skills have improved. The following list includes 12 recognized latte art designs.
- Heart: the most basic design and a natural introduction to latte art, created by pouring the latte in a single stream and then pulling straight out of the center of the cup
- Tulip: hearts layered on top of each other, completed with the same straight pull
- Rosetta: a side-to-side shake which creates leaf-like shapes running down the middle of the cup
- Swan: a rosetta-style body finished with a heart-shaped head, usually the first pattern tried after the basics
- Double rosetta: two rosettas poured side by side in order to create a larger, wider leaf
- Triple rosetta: the same idea as the double rosetta, with a third leaf added for extra width
- Stacked tulip: multiple layers poured in a tulip pour; more challenging due to the increasing difficulty of pouring into a full cup
- Leaf (fern): similar to a rosetta but poured at a slightly higher position in order to produce sharper leaves
- Flower: several small hearts poured around the cup with a center dot, forming a blossom shape
- Star: a pattern created through controlled bursts of the coffee rather than pouring in one continuous stream
- Seahorse: an advanced design that curves the pour into a seahorse-like shape, usually attempted after the swan
- Spiral: a free-poured spiral shape, sometimes finished with light etching for extra detail
The first three are what you will actually practice at home with the steps in this guide. The rest take more time, a trained eye watching your pour, and usually some hands-on correction to get right.
Also, wondering about coffee types? Read the blog “Explore the 15 Most Popular Types of Coffee“.
When You’re Ready to Take It Further
Practicing at home is an excellent way of getting used to the basic techniques; however, real improvement is achieved much faster through practice under expert supervision. Learning how to pour and then correcting yourself in real-time can be really challenging for you to do by yourself, especially when it comes to milk texture, because this parameter is hard to assess without athe demonstration by an experienced person.
If you are looking to speed up your learning process, then the One Day Latte Art Master Class at United Technical School located in Kumaripati, Lalitpur offers you an entire day’s worth of practice with a trainer teaching you everything about milk steaming and pouring techniques. This course is tailored especially for complete novices and does not require any previous knowledge.
The difference between the One Day Latte Art Master Class and the Barista Training Course is that the former course involves only a one-day training session focusing on only milk texturing and pouring skills, while the Barista class involves a more comprehensive training schedule affiliated with CTEVT, which covers espresso extraction and other aspects of cafe operations.
If you only want to practice basic latte art at home, then the One Day Latte Art Master Class will provide you an accelerated option.

Seats fill up fast for each session. Call +977 9801870715 or contact us to check the next available date and book your seat for the One Day Latte Art Master Class.
If you’re still deciding what to learn next, our guide to short-term courses after SEE in Nepal and our breakdown of affordable culinary courses in Nepal cover the full range of options at United Technical School.
From Bean to Cup: Master the Art of Coffee Making with UTS, Apply now !!
FAQs
Latte art is a design made on top of a latte by the process of pouring steamed milk into espresso in a controlled manner. Heart, Tulip, and rosetta are some examples of common designs.
A simple pour such as the heart design can be learned through a single practice session. Learning more complex patterns such as the rosetta will require more practice.
Yes, although the microfoam created using a frother will act a bit different from the milk that is steamed using a professional espresso machine. However, you can still use this practice your latte art skills, although the designs may vary from those made in cafes.
Looking to avoid the trouble of learning through trial and error? Enroll yourself for the One Day Latte Art Master Class at United Technical School, Kumaripati, Lalitpur. For further details and bookings, call +977 9801870715 or contact us.